In this article, we will explore how to create a website in minutes using AI-powered tools. While several options exist, such as Wix ADI, 10Web, and Durable, I personally recommend Hostinger’s AI Website Builder for its remarkable ease of use, speed, and affordability.
So, without further ado, let’s dive into the exciting world of AI website builders and explore how to build a website within minutes using AI and Hostinger’s intuitive platform.
Go to Hostinger AI Website Builder

Head over to Hostinger’s AI Website Builder. They often have amazing deals like 75% off or seasonal promotions, so be sure to check those out! But to get started right now, let’s click on “Try for Free.”
Building a website with Hostinger’s AI is incredibly easy. You have two main options: automatic website creation or starting with a pre-made template.
With the automatic option, you simply fill out a form providing your brand name, a description of your business, and your preferred color scheme. The AI then magically generates a website for you based on this information.
However, I personally prefer selecting a pre-made template. This allows me to visually browse various designs and choose one that truly aligns with my brand identity and aesthetics.
No matter which path you choose, Hostinger’s AI simplifies the website building process, making it accessible even to those with no technical experience.

Step 1: Select a pre-made template
Alright, let’s start with the pre-made template option since it offers a more visual and intuitive approach for those of us who prefer to see the design before committing. After all, a picture is worth a thousand words, right?


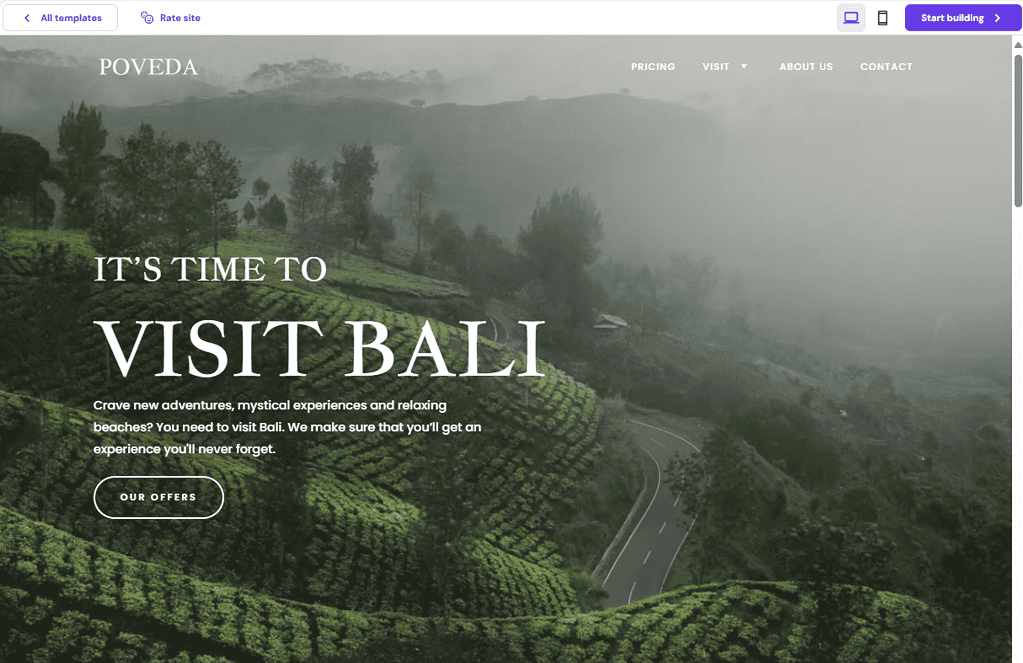
Hostinger offers a vast array of templates catering to different needs, from online stores to corporate websites. For this example, I’ve chosen the “Visit Bali” template because of its minimalist yet professional aesthetic.
Step 2: Edit your website (No coding required)
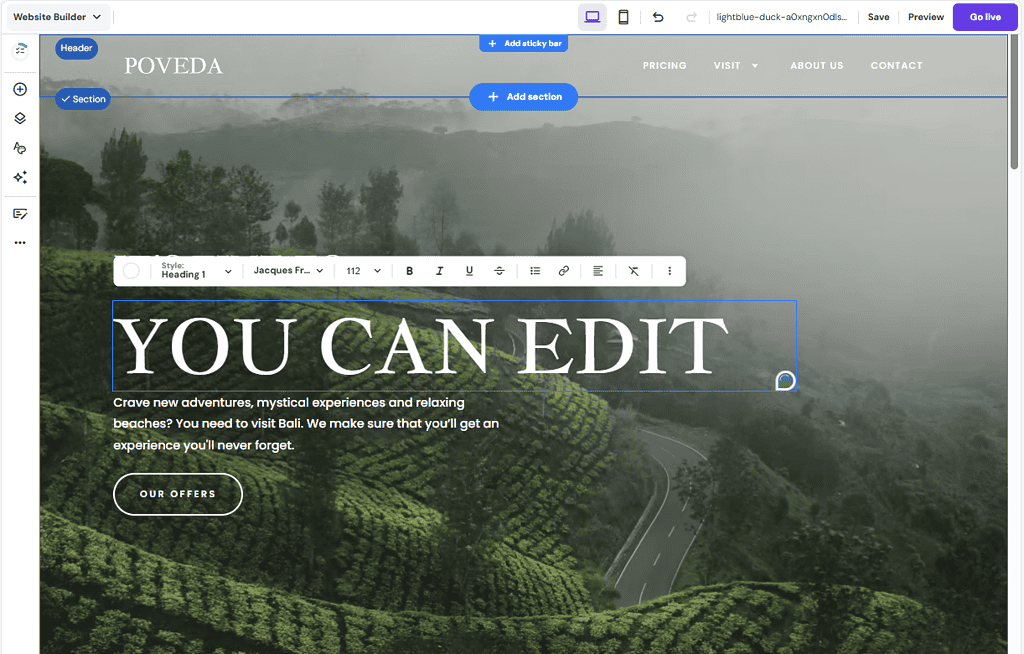
Now that I’ve chosen my template, it’s time to click on “Start Editing” in the top right corner. This is where I’ll tailor the template to my specific business, replacing the placeholder content with my own information. This step is crucial and can take a bit of time, depending on how much detail you want to provide your visitors.
I highly recommend not rushing this process. Your website is often the first impression potential customers have of your business, so it’s important to make it as professional and informative as possible. Begin by clearly stating your website’s or business’s purpose on the front page. Then, move on to the other pages, providing more in-depth details about your services, your company story (About Us), and how to contact you (Contact Us).
Step 3: Buying a domain name
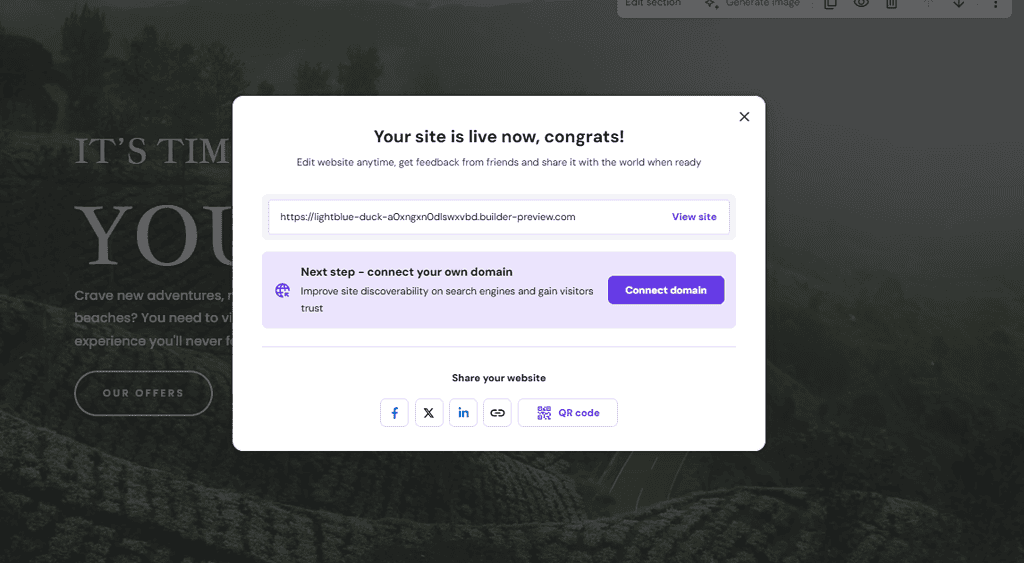
Once you’ve meticulously edited your website and are happy with the changes, it’s time to hit that “Go Live” button in the top right corner. This will generate a sample link where you can preview how your website will look on both desktop and mobile devices. Take a moment to thoroughly review everything and ensure it’s just the way you want it.
If you’re satisfied, the next step is to “Connect Domain.” Conveniently, Hostinger allows you to purchase a new domain directly through their platform, eliminating the need to visit external providers. I find this step-by-step process incredibly user-friendly. If you already own a domain name, you can seamlessly connect it here as well.

You’ll then be taken to a page where you can simply enter your desired domain name. Whether it’s a classic .com or a more unique TLD (top-level domain), the platform will instantly let you know if your chosen name is available for purchase. In this example, I’ve entered “webboexample.com” to see if it’s up for grabs.
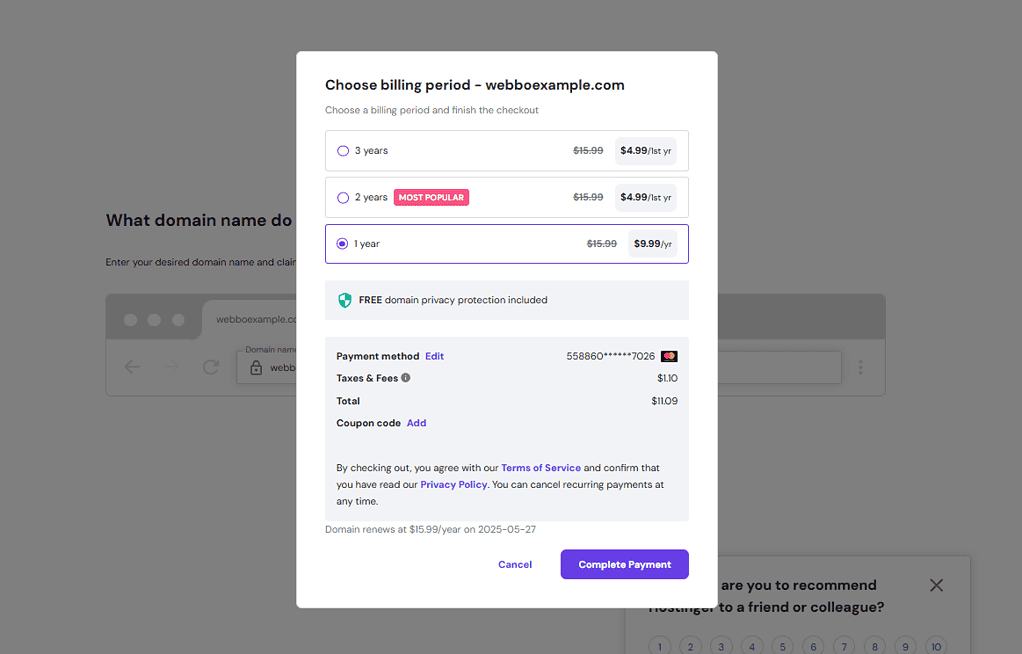
Once you’ve checked the availability of your domain name, simply follow the remaining steps to complete the registration. This will lead you to the billing process, where you’ll need to choose the duration for which you want to register your domain. Options typically include 1 year, 2 years, or 3 years.
For this example, I’ll opt for a 1-year registration as it allows me to test out the website and see how it performs before committing to a longer-term plan. It’s a great way to evaluate the platform’s features and see if it meets my needs.
Step 4: Buying your hosting and FINISH

As you proceed through the remaining steps, Hostinger will present you with hosting options. I strongly recommend opting for a plan that’s at least 12 months or longer, rather than just 1 month. While the monthly cost might seem lower with a shorter plan, you’ll end up paying more overall. Since your domain registration is already for 12 months, it makes sense to align your hosting plan with that duration to keep things simple and cost-effective.

As you can see, when I choose the 12-month plan, Hostinger offers a generous discount of 105.60 USD, bringing the total hosting cost down to just 38.20 USD. That’s incredibly affordable, especially considering the quality you get with Hostinger. Their servers are fast and reliable, even for websites based in Singapore.
Combining this with the domain name registration (let’s say you go for a .com), the total cost comes to only 11.09 USD (domain) + 38.20 USD (hosting) = 49.29 USD. That’s well under 50 USD for a complete, ready-to-use website with both a domain and hosting for a whole year!
Now, keep in mind that if you’re building an e-commerce store, you’ll likely need the Business plan or higher, which costs about 1 USD more per month. This upgrade is necessary to access features like product dashboards, easy product uploads, and other essential tools for running an online store. We’ll delve deeper into this later in the article.
For now, congratulations! Your website is ready for the world. Start sharing your site on social media, explore digital marketing strategies, or even run ads to drive traffic and attract visitors.
If you found this article helpful so far and decide to give Hostinger’s AI Website Builder a try, don’t forget to use our special coupon code 1WEBBO52 at checkout to save further on your hosting purchase.
Alternative Step 1: Automatically create a website
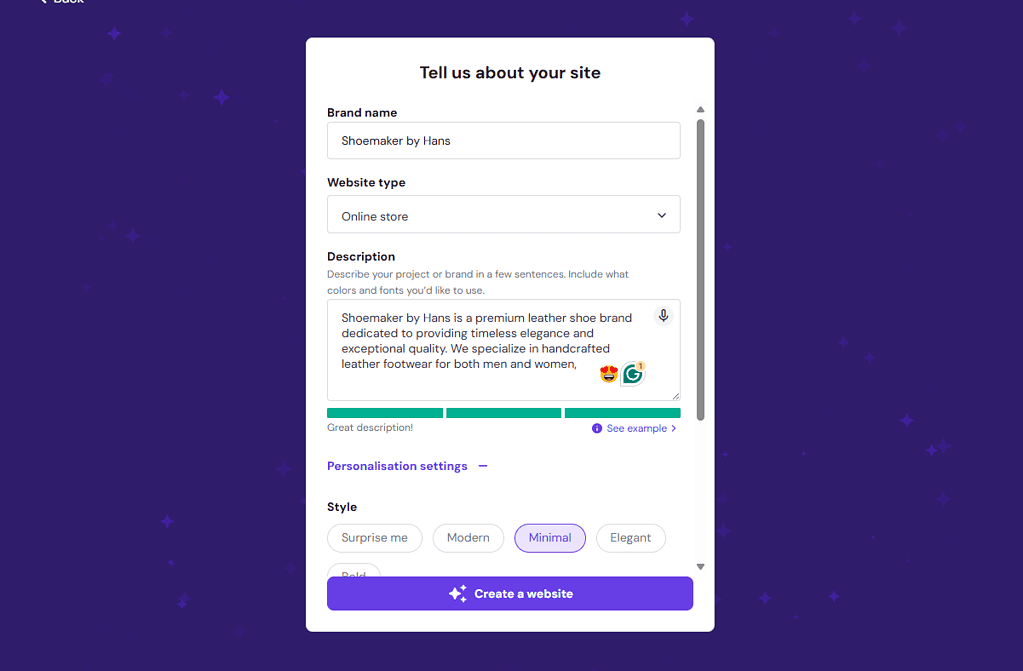
Now, let’s explore the alternative path: diving straight into website creation without selecting a pre-made template. This method is perfect for those who prefer to let the AI take the reins initially.
In this approach, you’ll be presented with a form where you provide key information about your website. You’ll specify your brand name, the type of website you want (e.g., blog, portfolio, online store), a brief description of your business, and any personalization preferences like a minimalist design or a specific color theme.
For our example, let’s name our brand “Shoemaker by Hans” and choose “Online Store” as the website type. We’ll keep the description concise and opt for a minimalist aesthetic. With this information, the AI will work its magic and generate a unique website tailored to our specifications.
Alternative Step 2: Edit your website (No coding required)
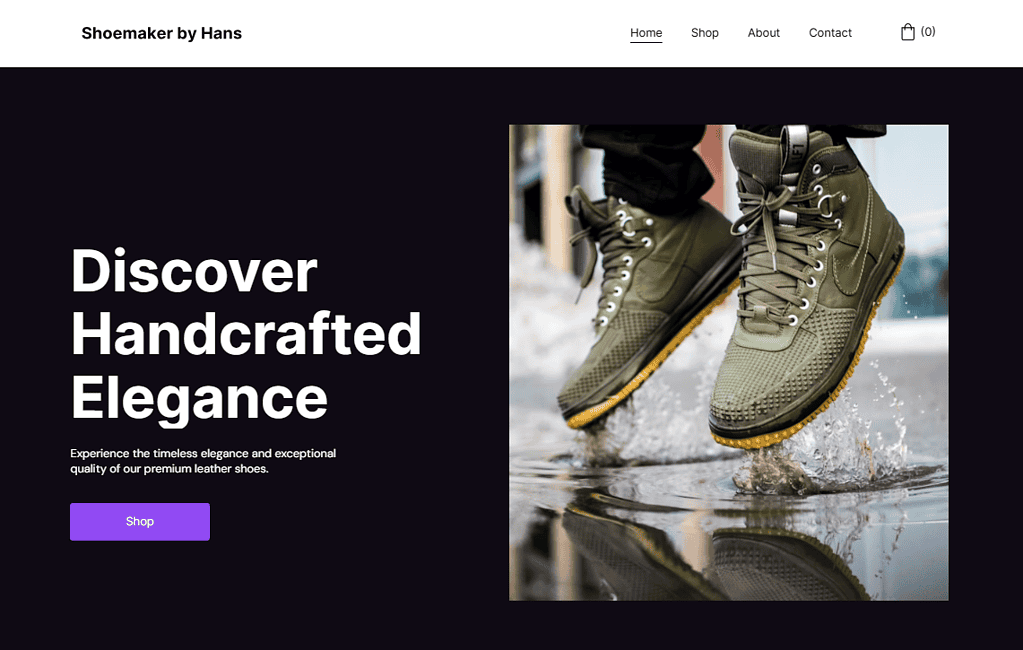
As you can see, the AI has generated a website tailored to my inputs, complete with AI-generated images of shoes that match the “Shoemaker by Hans” brand. Now, I can further customize the website just like I would with a pre-made template, adjusting the layout, content, and images to my liking.
I’m particularly impressed that the AI even included relevant web content in the form of paragraphs on the homepage, drawing information from the business description I provided earlier. This saves me a lot of time and effort in crafting content from scratch.
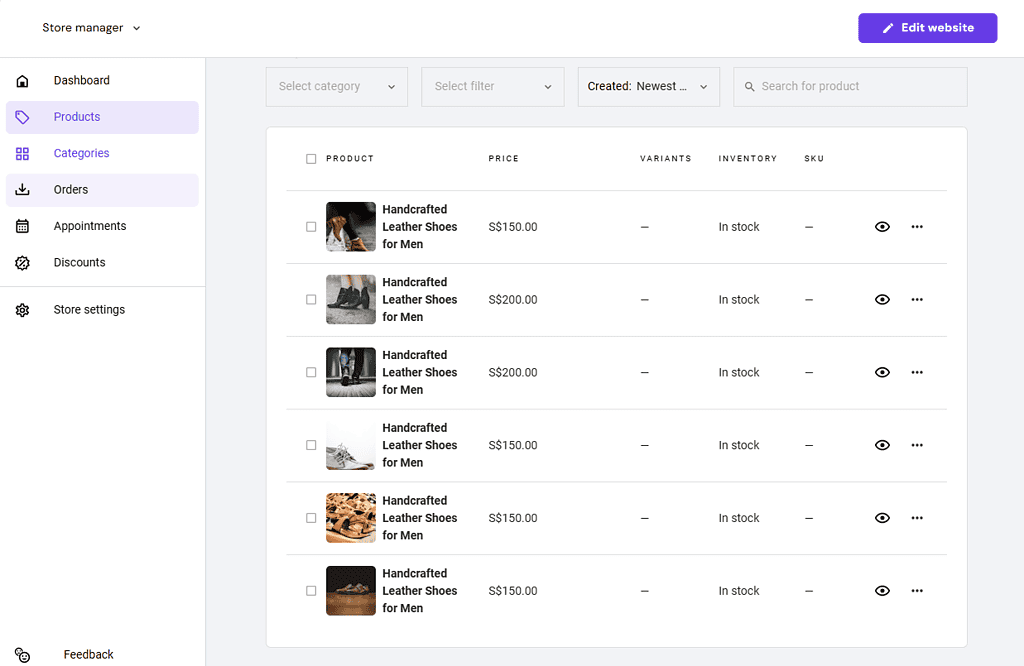
Since I chose the online store option, I’m also able to access a store manager dashboard. This is where I can easily manage my items, set prices, and, overall, control my e-commerce operations. The dashboard is user-friendly yet comprehensive, allowing me to view orders, order history, and even create discount codes for specific products if I want to run promotions.
I’m especially impressed that the AI even populated the dashboard with placeholder shoe products and prices. This gives me a clear starting point and makes it much easier to understand how to use the dashboard once I’m ready to add my actual products.
When you choose the alternative step of letting the AI generate your website, steps 3 and 4 remain the same. You’ll still be directed to purchase your domain and hosting through Hostinger’s seamless process. Once that’s complete, your website will be live and ready for the world to see.
Remember, if you encounter any difficulties along the way, don’t hesitate to explore the store settings or reach out to Hostinger’s customer support. Their excellent customer ratings speak volumes about their helpfulness and responsiveness. They’ll be happy to guide you through the process.
If you don’t want to build a website but still want online presence
Don’t want to build a full website? A “link in bio” tool could be your perfect solution! These affordable tools let you create a mini-website right in your social media profile.
Here are some popular link in bio tools:
- Linktree: The original and most well-known link in bio tool. It offers a simple, customizable landing page with basic analytics.
- Later’s Linkin.bio: A feature of the Later social media scheduling platform. It turns your Instagram feed into a clickable landing page, linking each post to a specific URL.
- Shorby: A more advanced tool with features like SmartPages (customizable landing pages), retargeting pixels, and deep linking.
- Milkshake: An app designed specifically for mobile users, allowing you to create a “social story” format landing page.
- Tap Bio: A highly customizable tool that lets you create mini-websites in your Instagram bio.
Curious about link in bio tools? Explore our Top 5 Popular Link in Bio Picks for Singapore to find the perfect one for showcasing your content, products, and more. It’s the easiest way to create a mini-website right in your social media bio!

